Automate part alignment
NC-PartLocator automates part setup and is the most significant step you can take to improve part quality. Part measurement is automatic, the alignment adjustment is automatic and the whole process takes a few minutes. As parts become increasingly complex, the removal of manual setup is a critical factor.
Check condition of supply
NC-PartLocator reports whether there is enough material to clean up, or if the part is under-sized. It answers the question - is it worth machining at all? The archived report supports any part rejection audit. As well as making perfect parts, our aim is to stop you making bad ones.
Compensate for distortion
NC-PartLocator is especially suited to parts prone to distortion or variable thickness. Where there is no overall single alignment, incremental setup stages are used within the process to align the part. Large structures often exhibit the same issues.
Simplify fixturing
NC-PartLocator can take measurements at any orientation, in any direction, to align the machine to the part before machining, meaning generic clamping fixtures can be used. This removes the need for expensive, bespoke fixtures and also allows the same fixture to be used for multiple parts (where applicable).
Increase in-process quality
At each stage of the part machining process, the software produces a report. This serves as an in-process quality ‘checkpoint’ as it proves whether or not the part will be machined within tolerance and, if not, production can be stopped immediately. This avoids wasting valuable resources and scrapping costly material.
Benefits for each stage of your production process
1 - Preparation
- Detect errors
- Audit condition of supply
- Take on more complex work
2 - Setup
- Simplify fixturing
- Reduce part setup time
- Detect errors
- Compensate for part differing from CAD
- Overcome skill shortages
- Move machine to the part instead of moving the part
3 - Machining
- In-process quality checks
- Eliminate scrap
- Detect errors
- Maximise machine ROI
4 - Inspection
- Detect errors
- Eliminate CMM backlogs
- Reduce part-to-part variation
- Increase part quality
5 - Assembly
- Part-to-part fit
6 - Delivery / End
- Increase profits
- Stabilise schedules
- Meeting Net Zero goals
- Increase productivity
Setup
- Simplify fixturing
- Reduce part setup time
- Detect errors
- Compensate for part differing from CAD
- Overcome skill shortages
- Move machine to the part instead of moving the part
Setup
- Simplify fixturing
- Reduce part setup time
- Detect errors
- Compensate for part differing from CAD
- Overcome skill shortages
- Move machine to the part instead of moving the part
Inspection
- Detect errors
- Eliminate CMM backlogs
- Reduce part-to-part variation
- Increase part quality
Delivery/End
- Increase profits
- Stabilise schedules
- Meeting Net Zero goals
- Increase productivity
Inspection
- Detect errors
- Eliminate CMM backlogs
- Reduce part-to-part variation
- Increase part quality
Setup
- Simplify fixturing
- Reduce part setup time
- Detect errors
- Compensate for part differing from CAD
- Overcome skill shortages
- Move machine to the part instead of moving the part
Delivery/End
- Increase profits
- Stabilise schedules
- Meeting Net Zero goals
- Increase productivity
Preparation
Audit Condition of Supply
Take on more complex work
Setup
Reduce part setup time
Detect errors
Compensate for part differing from CAD
Overcome skill shortages
Move machine to the part instead of moving the part
Preparation
Audit Condition of Supply
Take on more complex work
Automate part alignment
NC-PartLocator automates part setup and is the most significant step you can take to improve part quality. Part measurement is automatic, the alignment adjustment is automatic and the whole process takes a few minutes. As parts become increasingly complex, the removal of manual setup is a critical factor.
Accurate | Fast | SimpleCheck condition of supply
NC-PartLocator reports whether there is enough material to clean up, or if the part is under-sized. It answers the question - is it worth machining at all? The archived report supports any part rejection audit. As well as making perfect parts, our aim is to stop you making bad ones.
Security | Predictive | SimpleCompensate for distortion
NC-PartLocator is especially suited to parts prone to distortion or variable thickness. Where there is no overall single alignment, incremental setup stages are used within the process to align the part. Large structures often exhibit the same issues.
Accurate | Corrective | SimpleSimplify fixturing
NC-PartLocator can take measurements at any orientation, in any direction, to align the machine to the part before machining, meaning generic clamping fixtures can be used. This removes the need for expensive, bespoke fixtures and also allows the same fixture to be used for multiple parts (where applicable).
Cost saving | Flexible | SimpleIncrease in-process quality
At each stage of the part machining process, the software produces a report. This serves as an in-process quality ‘checkpoint’ as it proves whether or not the part will be machined within tolerance and, if not, production can be stopped immediately. This avoids wasting valuable resources and scrapping costly material.
Cost saving | Accurate | SimpleBenefits for each stage of your production process
Product Benefits

Increase profits
Machine time per part is reduced so more production time is available.
Eliminate scrap
Misalignment errors (the main cause of scrap) are eliminated.
Stabilise schedules
Achieve fixed setup times to keep production schedules on track.

Simplify fixturing
There is no requirement for fixtures with alignment capability.

Detect errors

Reduce part-to-part variation
Audit condition of supply
Automation
In-process quality checks
Eliminate CMM backlogs
Part to part fit
Watch it in action
Follow the process:
Check your machine is in tolerance
The machine tool and its probing system are benchmarked using NC-Checker. The probe is correctly calibrated and confirmed in 5-axis. Then the software performs a series of checks, including rotary and linear axis tests, to produce detailed reports. The report summary is the MSP benchmark wheel.
Check your part's condition of supply
The part is measured to check its condition of supply using NC-PartLocator. If there is too much distortion, or not enough material, the part process can be stopped. After all, there’s no point machining the part when it is already clear it will fail final inspection.
Get an accurate part alignment
Measurements taken in step 2 are used to calculate the part alignment. The machine controller is then automatically updated to compensate for any discrepancy between the part location and the machining program. All errors due to misalignment are eliminated.
Machine the part
The machining program runs at the corrected alignment. The machine tool has been benchmarked as capable of performing to the required tolerances.
Verify your machining
Once the machining’s complete, the part is measured again on the machine tool to ensure there are no machining errors before the part leaves the machine. A verification report is produced for traceability within the process, and any subsequent errors can be traced to fixture unclamping.
You've made a perfect part
You’ve made a perfect part with no concessions or errors.
Don't just take our word for it


Formula 1 team reduce part setup by 9.5 hours
Read more here

SST now producing 7 times more parts per week
Read more here
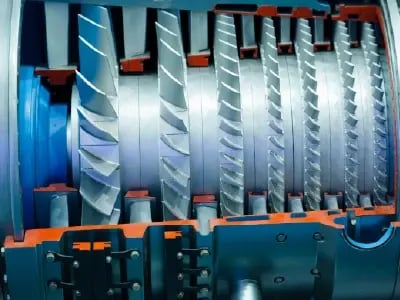
Doncasters increase productivity by 100%
Read more here

Formula 1 team reduce part setup by 9.5 hours
Read more here
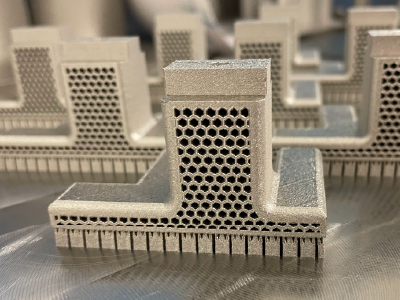
SST now producing 7 times more parts per week
Read more here
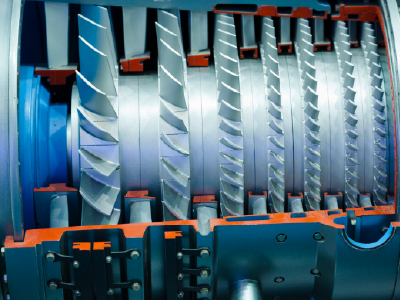
Doncasters increase productivity by 100%
Read more here
Short relevant title that’s easy to follow
More in-depth information about this, but keep it simple. What to expect, why should they follow the link?

Short relevant title that’s easy to follow
More in-depth information about this, but keep it simple. What to expect, why should they follow the link?
Frequently Asked Questions
Find out more about NC-PartLocator and the impact it can have on your CNC manufacturing processes.
Don't see the answer you're looking for? Please contact us below and we'll be happy to help.
- Production time reduced from 7 days to 4 hours
- Part setup time reduced from 5 hours to 10 minutes
- Part setup time reduced from 10 hours to 38 minutes
- Production of 7 times more parts per week
- 100% increase in productivity
NC-PartLocator eliminates errors associated with part production on a machine tool. Following NC-Checker’s benchmarking, the software first measures the part to check its condition of supply. If there is too much distortion, or not enough material to create a ‘good part’, the part process can be stopped from the outset.
These measurements are then used by the software to calculate what the best-fit alignment in 6 degrees of freedom should be and the controller is automatically updated to compensate for any discrepancy between the part location and the machining program.
There is no need for manual procedures like moving the part manually to get in the correct location or manually probing points one by one.
Yes! It eliminates all errors associated with poor condition of supply or part alignment before the part is machined, allowing them to be rectified before they affect the quality of the parts produced. In terms of the alignment, a key feature of NC-PartLocator is it calculates a 6-axis alignment for the part. This is unique to our software and allows us to achieve micro-precise accuracy and is the only way to achieve a true representation of where the part really is.
Absolutely! By removing alignment or condition of supply errors before the part is machined, NC-PartLocator ensures right-first-time production and the elimination of scrapped parts. Not only does this save in wasted raw materials but it also saves in wasted machine energy that was spent machining a part that was eventually scrapped.
By significantly reducing the time it takes for a part to be aligned or located on the machine, NC-PartLocator can also provide huge reductions in wasted energy as the machine is not sitting idle for long periods of time.
MSP can work with any type of spindle touch probe. We always suggest using the most accurate probe to remove uncertainty from the measurement results. As part of the NC-Checker Benchmark, the Probe Performance check will identify if an upgrade is required for the required part tolerances.


